Introduction
In short, GitHub is a cloud platform which enables developers to organise and share their code in “repositories”. I’ve been aware of the platform for some time, but I’ve never had the need to utilise the tool or get into the detail. This has now changed as I begin to use more Terraform.
Learning the basics of GitHub and how to successfully push code to a repository proved to be challenging. I hit a couple of major blockers and I couldn’t find much online to assist with my exact scenario. If like me, you are trying to figure out how to push code from Visual Studio Code (VS Code) to GitHub then please follow this guide step by step.
Overview of Steps
- Prerequisites.
- Create a GitHub Repository.
- Initialize Repository in VS Code.
- Commit and publish code to GitHub.
Prerequisites
Before starting, please ensure you have followed the below steps:
- Create a GitHub account online. A new account can be created by visiting this link.
- Install Git on your machine.
- Download and install VS Code.
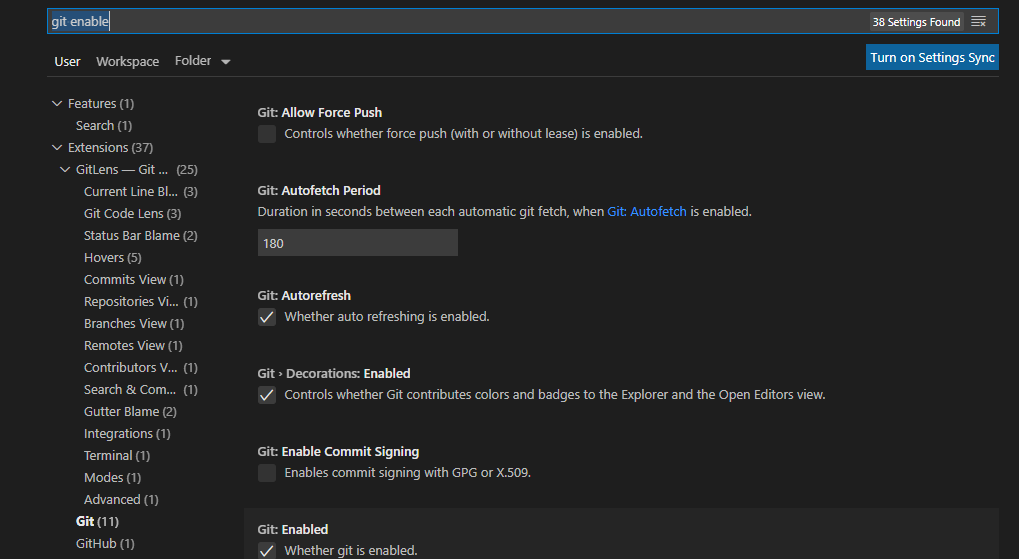
- In VS Code, go to settings and check if Git is enabled. Click on the gear icon in the bottom left hand corner, then choose Settings:
- Add a folder to VS Code with some project files in there.
Create GitHub Repository
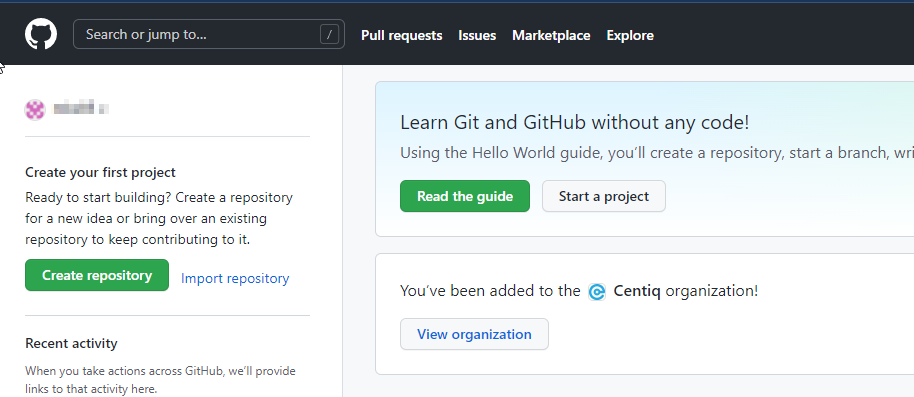
- Go to your GitHub account using a browser (if you don’t have one, please refer to the prerequisites section above) and click on “Create repository”.
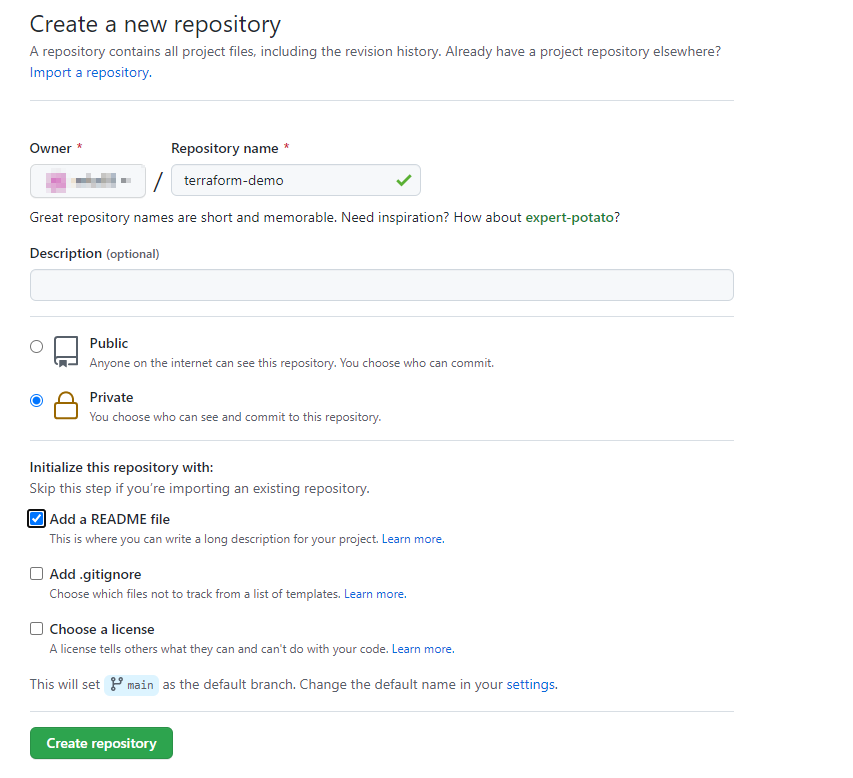
- Give the repository a name and select private. Also it is good practice to include a README file:
- Click on “Code” and copy the HTTPS address to your clipboard or notepad. Keep this safe as it will be required later.

Initialize Repository
We are now ready to configure VS Code to “speak” with GitHub.
- Add the local project folder on your workstation to VS Code. This can be done by clicking on the explorer icon, right click and “Add Folder to Workspace” option (that’s if you’ve configured a workspace). Customizing VS Code is not in scope of this guide, so please refer to VS Code documentation for additional information on this topic.
- Important – By default, GitHub creates a default branch called “main”. This was historically called “Master” but for some reason, VS code does NOT pickup this change and must configure this manually. The “Main” branch is where we want to publish code.
Open a Git Bash terminal and type in:
git config --global init.defaultBranch mainThis will tell VS Code to push code to the default main branch. This only needs to be done once, subsequent projects will default to the main branch.
- Important – Do not miss this step, as it caused me a world of pain. You need to add a .gitignore file to the project root directory on your workstation BEFORE you do anything else. In particular, we want GitHub to ignore any unnecessary files (mainly in the .terraform directory in my case).
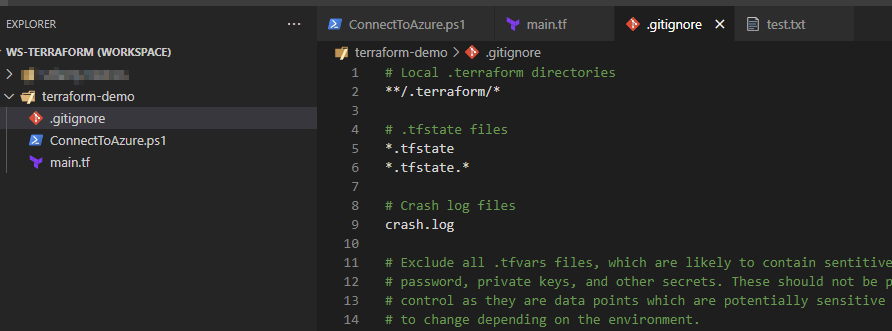
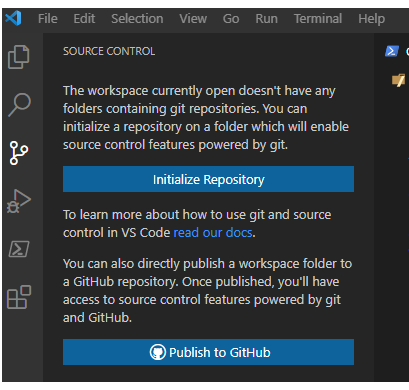
- In VS Code, click on the source control button and Initialize the Repository:
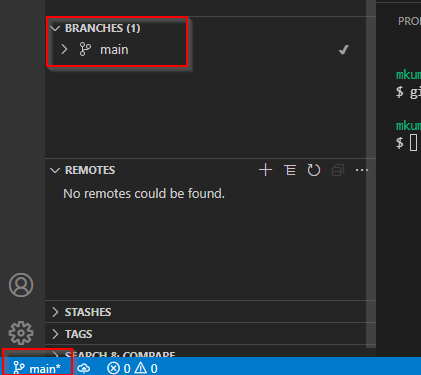
- In the bottom left hand corner, verify whether the default branch defaults to “main” as per previous command:
Commit and Publish Code to GitHub
We are now ready to push the local code files to GitHub.
- In the command palette (Ctrl + Shift + P) type in “Add Remote”:

- Paste in the repository URL that you copied from the earlier steps during the repository creation.
- Provide a name (I use the same name I have in GitHub for consistency).
- Confirm that the repository has successfully added:

- Important – We want to publish code to the main branch as described earlier. As we have instructed git and VS Code to look at main as the default branch, we must first perform a pull from GitHub to ensure the branches don’t clash. Otherwise the push will fail. In a Git Bash terminal perform a pull by using the repository name. In the example below, the repository name is “terraform-demo”:
git pull terraform-demo main- Now the project files that are waiting to be pushed, need to be committed. It’s good practice to provide a meaningful comment when you commit files so your team mates have a bit more information:

- We are now ready to push to the repo. Use the below command to successfully perform a push:
git push terraform-demoLog into GitHub using a browser and you will be able to see the newly pushed files:

Wrap Up
This guide walks you through the steps from configuring VS code to publishing your code to GitHub. Please take note of any points labelled “Important” as these were the stumbling blocks for me. That’s all for now, hopefully you found this guide helpful.

