Introduction
Azure migrate is the go to tool if you are migrating multiple workloads to Azure. But if you need a quick and easy method to migrate isolated virtual machines (VMs), then it might be more efficient to upload the VHDX file directly to Azure blob storage. The file can then be converted to a managed disk and ultimately a VM in Azure. This guide covers the task of uploading the VHD file to Azure blob storage.
Please note that you can’t upload VHDX files to Azure blob storage, the file must first be converted to VHD.
Follow below steps to convert a VHDX to VHD, and then upload it to Azure blob storage.
Convert VHDX to VHD
As stated, Azure blob storage will not accept a VHDX file. If you attempt to upload a VHDX file, then an error similar to below will be presented:
	{
	    "status": "Failed",
	    "error": {
	        "code": "BadRequest",
	        "message": "Disk 'disk-drive-ide0.vhd' with blob https://x.blob.core.windows.net:8443/jmpbx/disk-drive-ide0.vhd is of Dynamic VHD type. Please retry with fixed VHD type."
	    }
}- Firstly, ensure you have full administrative rights to the VHDX file, then run the following command in PowerShell to convert the file to VHD format:
Convert-VHD -Path c:\storage\disk-drive-ide0.vhdx -DestinationPath C:\storage\disk-drive-ide0.vhd -VHDType FixedReplace the path and destination path to match the location of your VHDX file.
Important: It is extremely important the VHDType switch is used and the disk is converted to “Fixed”. Azure blob storage does not accept dynamic disks.
2. Verify the disk size of the VHD file BEFORE it is uploaded to Azure blob storage by running the below PowerShell command:
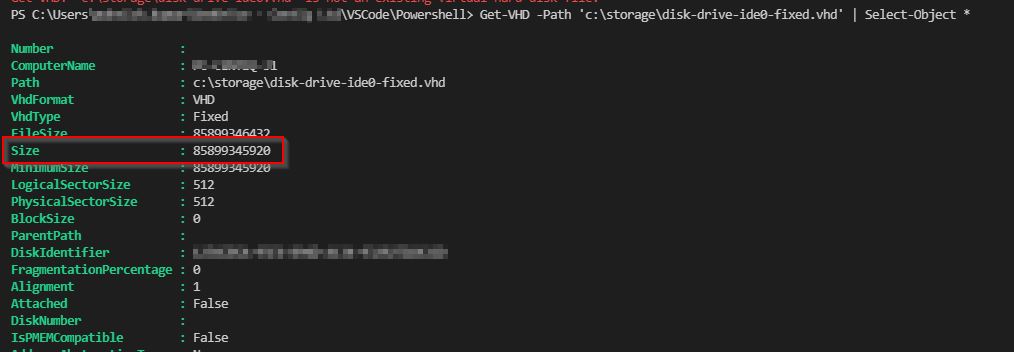
Get-VHD -Path 'c:\storage\disk-drive-ide0.VHD' | Select-Object *You will see an output like below. The number we are checking is highlighted in the red rectangle:

3. The disk must now be resized to a compatible Azure managed disk size.
Refer to the table below and pick the desired disk size, by choosing a value from the GiB Bytes column. For example, if you need the disk size to be 128GB then select 137438953472.
| Valid Disk Values | GiB Bytes |
| 128 | 137438953472 |
| 256 | 274877906944 |
| 512 | 549755813888 |
| 1024 | 1099511627776 |
| 2048 | 2199023255552 |
| 4096 | 4398046511104 |
Enter the below Powershell command to set the disk size:
Resize-VHD -Path 'c:\storage\disk-drive-ide0.VHD' -SizeBytes '137438953472' #for a 128 GiB Disk4. Verify the disk size has changed by running the below command:
Get-VHD -Path 'c:\storage\disk-drive-ide0.VHD' | Select-Object *Upload VHD file to Azure Blob Storage
My preferred method of uploading files to Azure storage is by using Azure storage explorer. It can be downloaded by clicking here.
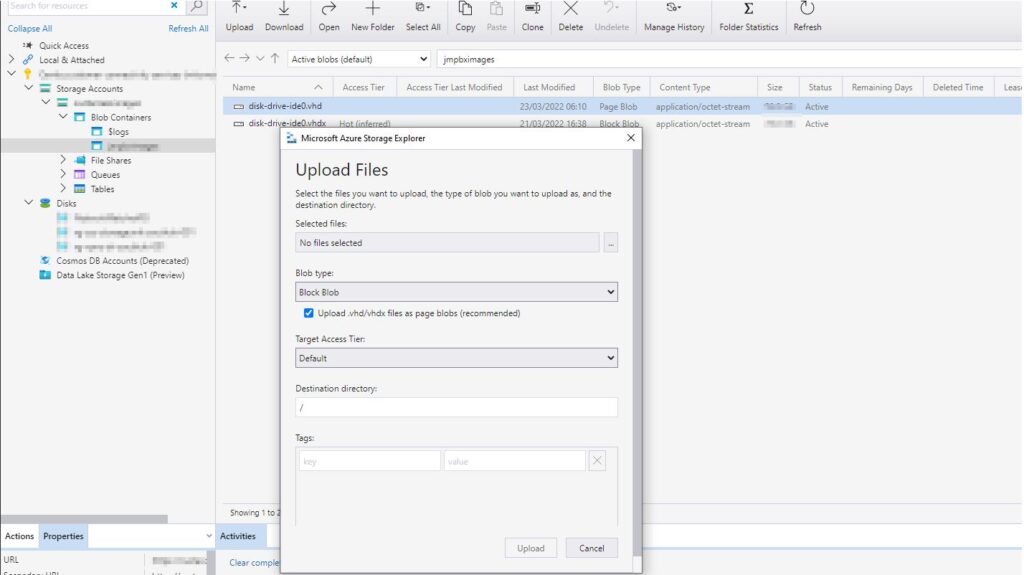
This guide assumes that an Azure storage account has been pre-defined. Sign into your subscription where the Azure storage account resides and simply upload the new VHD file to the desired containter:

The VHD file will now be available in Azure blob storage. If desired, a managed disk can be created based on the VHD.

